Skip to product information

Asymmetric Magnetic Screen

MOSKERA®
4.8
★ ★ ★ ★ ☆
Regular price $209.99
Regular price $209.99 Sale price
SAVE Sold out
 
Black
Black
White
White
 
 
This field is required!
✏️ Asymmetric customization (magnetic model) — click here
This asymmetric magnetic model can be fully customized: different heights, sloped top, different widths, and even a V-shape at the bottom (uneven floors).
Example (left to right): L 120 / R 180 cm · left H 220 cm / right H 205 cm (≈ 47.2/70.9 in · 86.6/80.7 in)
✅ No separation, central separation or multiple separations? Possible.
✅ A V-cut at the bottom (uneven floor)? Also possible.
Enter your dimensions clearly and in order (left to right) in the order note on the cart page, or contact support after checkout.
⚠️ Safety measure: for any asymmetric / custom request (different heights, slope, V, etc.), we apply Velcro on both sides to prevent any mistake (ours or the customer’s).
  • Mastercard
  • Visa
  • Apple Pay
  • Shop Pay
  • American Express
  • Klarna
  • PayPal
Carrier

Asymmetric shapes delivered from Tue 29 Sep

Free shipping over $50 6–9 days production time for all asymmetric-shape models.
Asymmetric Shapes model

Custom-made for pergolas, shelters, sloped verandas and more.

long magnets Extra-long magnets (6")
Divisible Any shape possible, custom made
Thick mesh E-glass fiberglass mesh
Steel rods Gravity rods distributed along the entire bottom
Weather resistant Resistant to extreme weather conditions
Surface compatibility Compatible with wood, aluminum, PVC, plaster & more
Velcro width Velcro width: 2" (4 cm) at the top, 1" (2 cm) on the sides
MOSKERA

Custom asymmetric magnetic screen for sloped openings

The premium solution for openings with different heights (sloped roof, covered terrace, unusual opening), with the option of different widths, sloped / uneven floor (e.g. “V”-shaped floor), and options on request.

Custom asymmetric Options on request Magnetic closure
1. Designed for different heights

The asymmetric version is ideal when one end is higher than the other: sloped roof, covered terrace, conservatory, non-standard opening. The result: a magnetic screen that matches the reality of your opening.

  • Fewer gaps / better protection
  • A cleaner finish than a cut-down “standard” screen
  • Everyday comfort (smooth passage)
2. Different widths: possible on request

You can also have an opening that is asymmetric in width (for example, a protrusion on one side). In that case we adapt the cut and the configuration: just send us the necessary information.

  • Inch-precise fit (round up to the nearest inch)
  • Suitable for large widths and unusual openings
  • Truly custom manufacturing
3. Sloped / uneven floor (e.g. “V”): possible

A common case outdoors: a floor that is not perfectly straight. We can make a suitable magnetic screen, even if the bottom is sloped or “V”-shaped (centre lower than the sides).

  • Better seal at the bottom
  • Less gap for insects
  • A cleaner finish than a makeshift solution
4. Closure & separations: fully modular

Depending on your needs, we can add magnetic central separations (multi-panel), or zips placed wherever you like.

  • Magnetic central separation (easy passage)
  • Zips: targeted opening, practical depending on use
  • Configuration on request (specify in the comments)
5. Wind option: reinforced weights at the bottom

For exposed areas (draughts, terrace, seaside), we can add more weight to the bottom of the magnetic screen to improve wind resistance.

  • Better stability
  • Less flapping
  • Improved comfort of use
6. Ideal for
  • Terraces with a sloped roof
  • Openings with left height ≠ right height
  • Unusual openings (conservatory, extension, pergola)
  • Sloped / uneven floor (on request)
Measurements required for the asymmetric model
3 essential measurements

To make your custom asymmetric magnetic screen, we need 3 dimensions:

  • Total width (W): from end to end
  • Lowest height (H low): the shorter side
  • Highest height (H high): the taller side
To specify in the comments (if relevant)
  • Different widths: indicate the width measured at each end + any useful info.
  • Sloped floor: indicate the difference (e.g. “+2 in on the left”).
  • “V”-shaped floor: indicate the difference between the centre and the sides (e.g. “centre 4 in lower”).
  • Options: zips (location), magnetic central separations (number), reinforced weights at the bottom.

For more information, see the "how to measure" page. 👇


design_services

How to measure?

Tape measure icon How to measure correctly? (Asymmetric model)

A: Measuring on the opening frame?
➜ Add +4 cm in width and +2 cm in height (velcro strips of 2 cm on the sides).

B: Measuring on the final mounting frame (outside / inside)?
Add nothing, measure down to the lowest point of the floor.

Information icon Specific to the asymmetric model: 3 required dimensions

For the asymmetric model we only need:

  • Total width: inner width of the opening.
  • Height H1: lowest height (shortest point).
  • Height H2: highest height (tallest point).

No left / right side to specify: for safety we automatically apply the velcro on both sides to avoid any mistake.

Asymmetric fly screen measuring diagram (Width, H1, H2)
Information icon

Need an adjustment?
➜ The fly screen can be slightly folded up at the bottom without hindering use.

Tip icon

Tip: always round up to the nearest centimetre
Better a bit too big than too tight 😉

vertical_shades

How to install?

Installation in 5 steps

1

Carefully clean the frame of your asymmetric configuration with a damp wipe, then leave to dry for 1 minute.

2

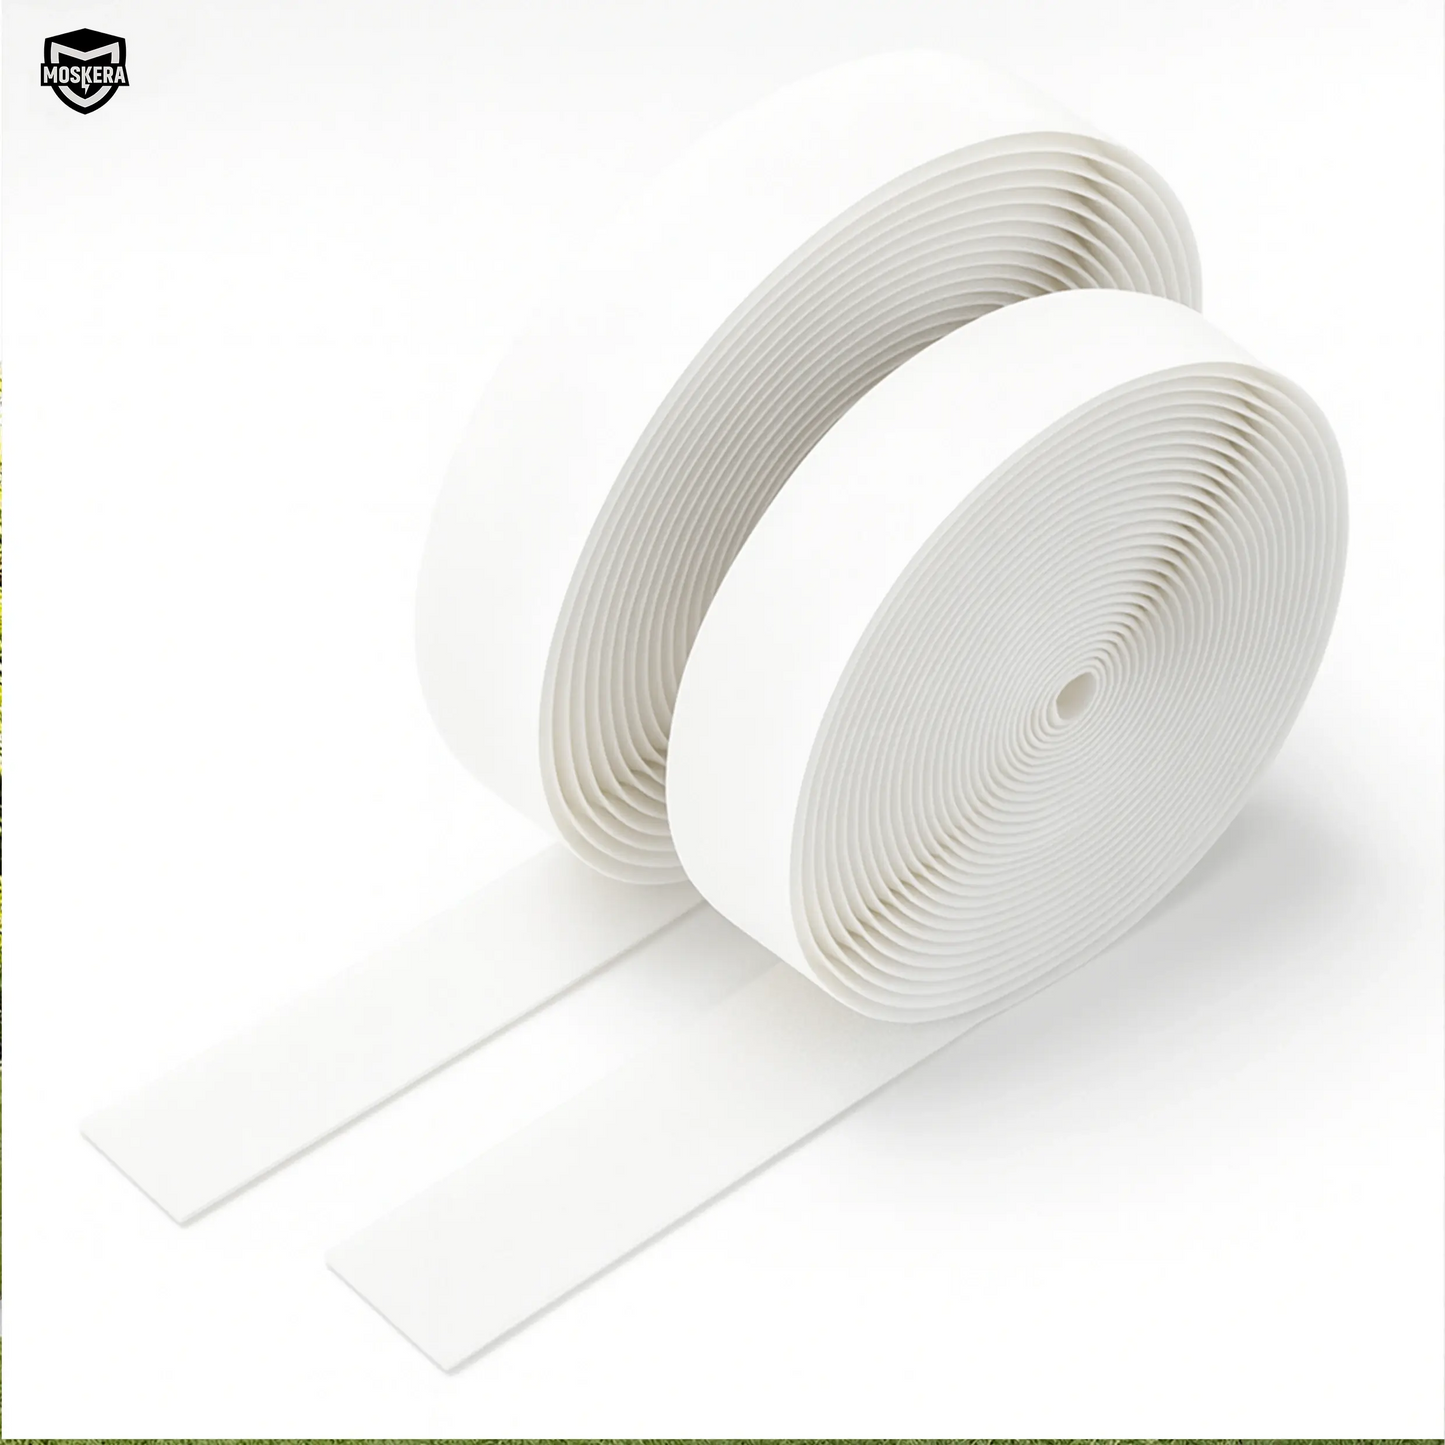
Unroll the double-sided velcro, measure and then cut it into 3 pieces (2 heights and 1 width).

3

Peel off the adhesive backing, then apply the 3 pieces around the frame (except at the bottom).

4

Press firmly on each piece of velcro to ensure optimal adhesion. If needed, add more double-sided tape or use nails depending on your frame type.

5

Attach the fly screen velcro to velcro, align it correctly, then adjust if needed. Enjoy your fly screen and an insect-free summer!

🔹 Note: The magnets are already built in and discreetly hidden in the central row of the fly screen.

verified

Made-to-measure customisation

Your dimensions are not available? No worries!


To create your large custom mosquito screen, select the appropriate "Custom Size" option, then enter your exact dimensions (e.g.: 100" × 90", Width × Height).

Choose the right option:

🟢 Custom Size 1
➤ Up to 120" width and 120" height

🟡 Custom Size 2
➤ Up to 160" width and 160" height

🟠 Custom Size 3
➤ Up to 240" width and 240" height

🔴 Custom Size 4
➤ Above these limits (no maximum in width or height)

local_shipping

Shipping & returns

Shipping & Returns

Preparation / production

24/48h (and up to 7 days maximum for custom-made sizes).

Shipping

Canada 🇨🇦
All sizes included
Canada Post

Home delivery

Canada Post

➜ 5 to 7 business days
Rest of the world 🌍
All sizes included
Carrier

Home delivery

DHL

➜ 6 to 9 business days

Returns

Any product (excluding custom-made) can be returned for any reason within 30 days after delivery.
Free returns at our expense.

Refunds

Back to the original payment method within 2 to 5 days.


MOSKERA DAYS

-10%on 1

-20%on 2

-30%on 4

Discount automatically applied at checkout!

ENDS IN 00d 00h 00m 00s

Box contents

Magnetic screen

Magnetic screen

Velcro tape

Velcro tape

Installation manual

Installation manual

View full details

✓ Quick installation

✓ Suitable for renters

✓ Powerful magnets

✓ Strong mesh

✓ Made to measure

✓ Fits all doors

✓ Free returns

✓ Made-to-measure customisation

✓ Quick installation

✓ Suitable for renters

✓ Powerful magnets

✓ Strong mesh

✓ Made to measure

✓ Fits all doors

✓ Free returns

✓ Made-to-measure customisation

✓ Quick installation

✓ Suitable for renters

✓ Powerful magnets

✓ Strong mesh

✓ Made to measure

✓ Fits all doors

✓ Free returns

✓ Made-to-measure customisation

✓ Quick installation

✓ Suitable for renters

✓ Powerful magnets

✓ Strong mesh

✓ Made to measure

✓ Fits all doors

✓ Free returns

✓ Made-to-measure customisation

Key highlights:

bolt
Thick magnets

15 cm long! Hidden in every central separation you want.

timer_10_alt_1
Quick installation

Easy installation on any asymmetric configuration. Made-to-measure dimensions only.

fitness_center
Solid as a rock

Thick premium fibreglass mesh with UV protection. Tear-proof & flame-retardant.

mode_dual
Preserved freshness

Finely woven mesh (20x20), for fresh, pure air that is constantly renewed.

Laser cutting.

Made-to-measure manufacturing designed for asymmetric openings

Special shapes require constant precision. That's why we invested in a high-end laser cutting machine capable of producing complex cuts with great finesse and excellent consistency.

  • High-precision cutting for arches, slopes, angles, polygons and custom shapes
  • Consistent quality: repeatability and consistency from one piece to the next
  • Premium finish: clean lines, better-controlled fit, superior visual finish

Reliable magnets.

Powerful 15 cm long magnets along the entire central column, hidden beneath our patented closure system for unmatched wind resistance.

CUSTOMER REVIEWS

CUSTOMER REVIEWS

CUSTOMER REVIEWS

CUSTOMER REVIEWS

CUSTOMER REVIEWS

CUSTOMER REVIEWS

CUSTOMER REVIEWS

CUSTOMER REVIEWS

CUSTOMER REVIEWS

CUSTOMER REVIEWS

CUSTOMER REVIEWS

CUSTOMER REVIEWS

CUSTOMER REVIEWS

CUSTOMER REVIEWS

CUSTOMER REVIEWS

CUSTOMER REVIEWS

They’ve stopped the mosquitoes… and the reviews speak for themselves

Customer Reviews

Be the first to write a review
0%
(0)
0%
(0)
0%
(0)
0%
(0)
0%
(0)

Frequently asked questions.

square_foot

How do I measure my door / window / patio door?

Before you start, make sure to take accurate measurements. Two methods are available to select the correct size (your choice). Details are explained below for each model.

DOOR MODEL
Measure on the installation area Recommended

Measure directly the final surface where the fly screen will be installed (outer frame / installation area). You will obtain a Width × Height size ready to select.

Measure from the inner frame

Measure the inner door frame, then add:

  • +4 cm to the width (2 cm on each side)
  • +2 cm to the height

Example: 96 × 208 cm → final size: 100 × 210 cm

Size selection
  • If the result matches a standard size, select the corresponding model.
  • Otherwise, choose a Custom size category
Custom size category
  • Custom M: width ≤ 150 cm and/or height ≤ 230 cm
  • Custom L: width ≤ 200 cm and/or height ≤ 260 cm
  • Custom XL: width > 200 cm and/or height > 260 cm
⚠️ If your opening exceeds 300 cm in width or if you want a fly screen with multiple panels, we recommend choosing the Large Size model.
WINDOW MODEL
Measure on the installation area Recommended

Measure directly the final surface where the fly screen will be installed (outer frame / installation area). You will obtain a Width × Height dimension.

Measure from the inner frame
  • +4 cm to the width (2 cm on each side)
  • +4 cm to the height (2 cm top and 2 cm bottom)
Custom size category
  • Custom M: width and height < 100 cm
  • Custom L: width or height between 100 and 200 cm
  • Custom XL: width or height > 200 cm
LARGE SIZE MODEL
Measure on the installation area Recommended

Measure directly the final installation area (patio door, bay window, large opening).

Custom size category
  • Custom 1: width or height up to 300 cm
  • Custom 2: width or height up to 400 cm
  • Custom 3: width or height up to 500 cm
  • Custom 4: width or height up to 600 cm
  • Custom 5: no width or height limit
✅ This model is exclusively available as custom-made.

Need help taking your measurements?

Got your measurements?
Configure your made-to-measure mosquito net: exact dimensions, fitted in 10 minutes with no drilling.

Configure my made-to-measure screen
vertical_shades

How is it fitted?

Installation in 5 steps

1

Carefully clean the frame of your asymmetric configuration with a damp wipe, then leave to dry for 1 minute.

2

Unroll the double-sided velcro, measure and then cut it into 3 pieces (2 heights and 1 width).

3

Peel off the adhesive backing, then apply the 3 pieces around the frame (except at the bottom).

4

Press firmly on each piece of velcro to ensure optimal adhesion. If needed, add more double-sided tape or use nails depending on your frame type.

5

Attach the fly screen velcro to velcro, align it correctly, then adjust if needed. Enjoy your fly screen and an insect-free summer!

🔹 Note: The magnets are already built in and discreetly hidden in the central row of the fly screen.

workspace_premium

What guarantees do you offer?

We offer a 30-day 0-bite or 100% refund guarantee.

The item must be as new and returned in its original packaging, with its box and accessories. Made-to-measure items are excluded from this guarantee.

local_shipping

How long does delivery take?

Shipping & Returns

Preparation / production

24/48h (and up to 7 days maximum for custom-made sizes).

Shipping

Canada 🇨🇦
All sizes included
Canada Post

Home delivery

Canada Post

➜ 5 to 7 business days
Rest of the world 🌍
All sizes included
Carrier

Home delivery

DHL

➜ 6 to 9 business days

Returns

Any product (excluding custom-made) can be returned for any reason within 30 days after delivery.
Free returns at our expense.

Refunds

Back to the original payment method within 2 to 5 days.


not_listed_location

Where are you located?

We are based in Montpellier, in the south of France. Find our company details in our legal notice.

indeterminate_question_box

What materials do you use?

We use only high-quality materials to ensure reliable and durable fly screens.

The mesh is made of pure premium E-glass fibreglass, carefully woven for excellent strength and a perfect finish.

The edges are reinforced with robust nylon, and our magnets are designed for exceptional everyday reliability.

Every element is designed to combine performance and durability.

  • No more

    mosquitoes once fitted

  • +200%

    of comfort and relief

  • High

    strength and durability

  • 10min

    of tool-free installation

  • 30 days

    satisfied or refunded

  • Zero

    health-harmful products

    A Magnetic Screen for Triangular, Angled and Irregular Openings

    Some openings are not rectangles and never were. A gable glazed to the peak, a window that follows the pitch of a roof, a trapezoid over a stairway, the angled end panel of a sunroom: none of them exist in any stock size, and a rectangular screen either leaves a triangle of open gap or covers half the light. This panel is cut to the actual outline of the opening, whatever that outline is.

    The Openings This Is Made For

    Gables and peak glazing

    The glazed gable end is the classic case: a wide base, two sloping sides and a point at the top, often several feet across. It is usually the highest opening in the room, which makes it the one doing the venting on a warm evening, and therefore the one worth covering rather than the one easiest to reach.

    Cathedral ceilings and rooms in the roof

    Where a ceiling slopes, the window frequently sits in that slope and the opening is a trapezoid rather than a rectangle. Heat collects at the top of those rooms and the angled window is the cheapest way to get rid of it, which is exactly why it stands open at the hour bugs are most active.

    Stairway windows, sunrooms and porches

    Tall stairway glazing that follows the run of the stairs, and the angled side panels where a sunroom or porch roof meets the walls. All of them are shapes a screen shop would quote for and no stock frame can touch.

    Central Splits, and Why a Big Panel Needs Them

    This screen takes one to four central splits, which is two to five panels, and on the largest openings the choice is not only about walking through.

    Each split is a magnetic closure that parts as you pass and pulls itself shut behind you, so on a door height opening the number of splits is simply how many walk-through points you want. On a wide gable or a run of several feet, splits do something else as well: they break what would otherwise be one very large sheet into sections you can fit, handle and take down alone, and they keep the mesh taut across a long span. As a rule of thumb, add a split for every panel width you would not want to hold at arm's length on a step ladder.

    Measuring an Asymmetric Opening

    Start with a sketch, not with numbers

    Draw the outline of the opening on paper first, roughly to shape, then write the measurements onto the drawing. Every irregular opening we see is measured wrong in the same way: the numbers are right, but afterwards nobody can tell which edge each one belongs to. A sketch removes that entirely.

    What to measure on a triangle or a trapezoid

    For a triangular gable: the full width at the base, the vertical height at each end, the height to the peak, and how far the peak sits from the left hand edge if it is not centered. For a trapezoid: the width at the bottom, the width at the top, and the vertical height at both ends. In both cases measure the opening you want covered rather than the glass, and take every dimension twice.

    Where the slope meets the wall

    The corner where a sloping edge meets a vertical one is the point that has to be right, because a small error there opens a gap along the whole slope. Measure into the corner rather than estimating it, and note whether the frame runs flush into the drywall or stops short of it.

    Fitting on a Slope

    A sloped or overhead edge behaves differently from a vertical one: the weight of the panel pulls along the adhesive line instead of hanging straight down from it. That makes surface preparation matter more here, not less. Clean the whole run with rubbing alcohol, let it dry, press the strip down along its full length rather than at intervals, and give it time before hanging the mesh. Fit in the morning rather than onto a frame that has been in full sun all afternoon.

    Made to Measure Cannot Be Returned

    A panel cut to your outline fits no other opening, so unlike a stock size it cannot come back. Spend the extra fifteen minutes on the sketch and the measurements, and tell us about anything unusual with the order: hardware inside the opening, a deep jamb, a beam crossing the glazing, or a shape that is not quite the triangle it looks like from the floor.

    A-Frames, Chalets and Cathedral Ceilings

    This is the Canadian shape. The A-frame and the chalet gable glazed from the deck to the peak are the defining form of cottage and ski country building, and the great room with a cathedral ceiling repeats it in the suburbs. In both, the operable panel sits high in a triangle or a run of trapezoids, which is where the warm air goes and which no stock screen has ever fit.

    The cottage, and why it is worse there

    A cottage is usually close to moving water, which is precisely where black flies breed, and its big gable faces the lake. It also sits unattended most of the year. Something you put up on arrival, take down in September and bring home with you suits that better than a fixed installation nobody is around to look after.

    Seasonal removal, and why splits matter more here

    The panel is going to come down every fall and go back up every spring, because that is how screens are treated in this country and because leaving anything on a high gable through freeze and thaw is asking for it. Order enough splits that each section is something one person can handle from a ladder, rather than one large sheet that needs two people and good weather.

    The mesh, plainly

    Standard 18x16 mesh stops mosquitoes, houseflies and wasps. It is not fine enough for black flies, which need 20x20 screening we do not offer. If black flies rather than mosquitoes are your real problem, that is worth knowing before you order.